Custom Logging in Microsoft Fabric Notebooks
Introduction
In our continued journey into Microsoft Fabric, today we are going to explore a method of custom logging in Notebooks using Python to save custom logs to an Eventhouse in Microsoft Fabric.
There are different ways you can implement logging in Microsoft Fabric, but by using an Eventhouse we can create real time dashboards that we can use to monitor errors from notebooks as they are running. It also gives us the ability to create notifications from those activities. I will cover the Eventhouse in a later blog post.
Create Eventhouse
To get started we need to create an Eventhouse in Microsoft Fabric which we can use to write our logs to. We start by navigating to our workspace in Fabric that we want to work in and then click on the " + New item" button.
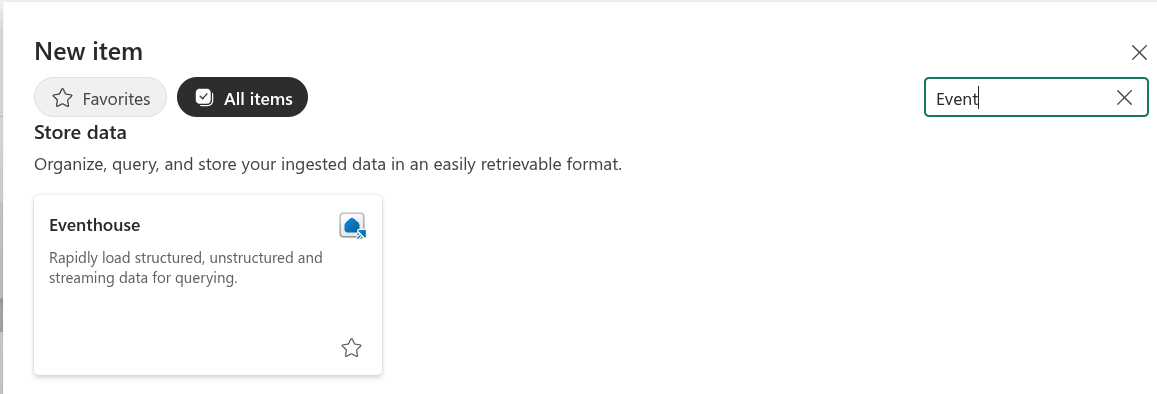
This will bring up a list of items for you to choose from. If you do not see it on the first page, click on the "All items" tab. Do a search for "Event". You should see a result for "Eventhouse" like the image below. Click on Eventhouse.
Give your New Eventhouse a name and click "Create". In this example I called mine "Logging".
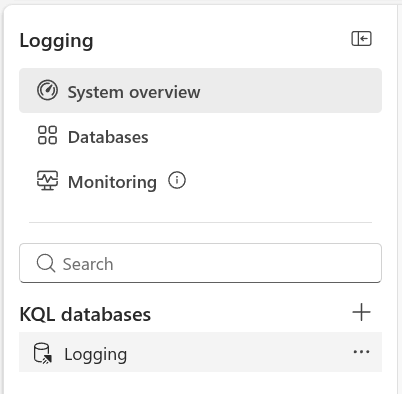
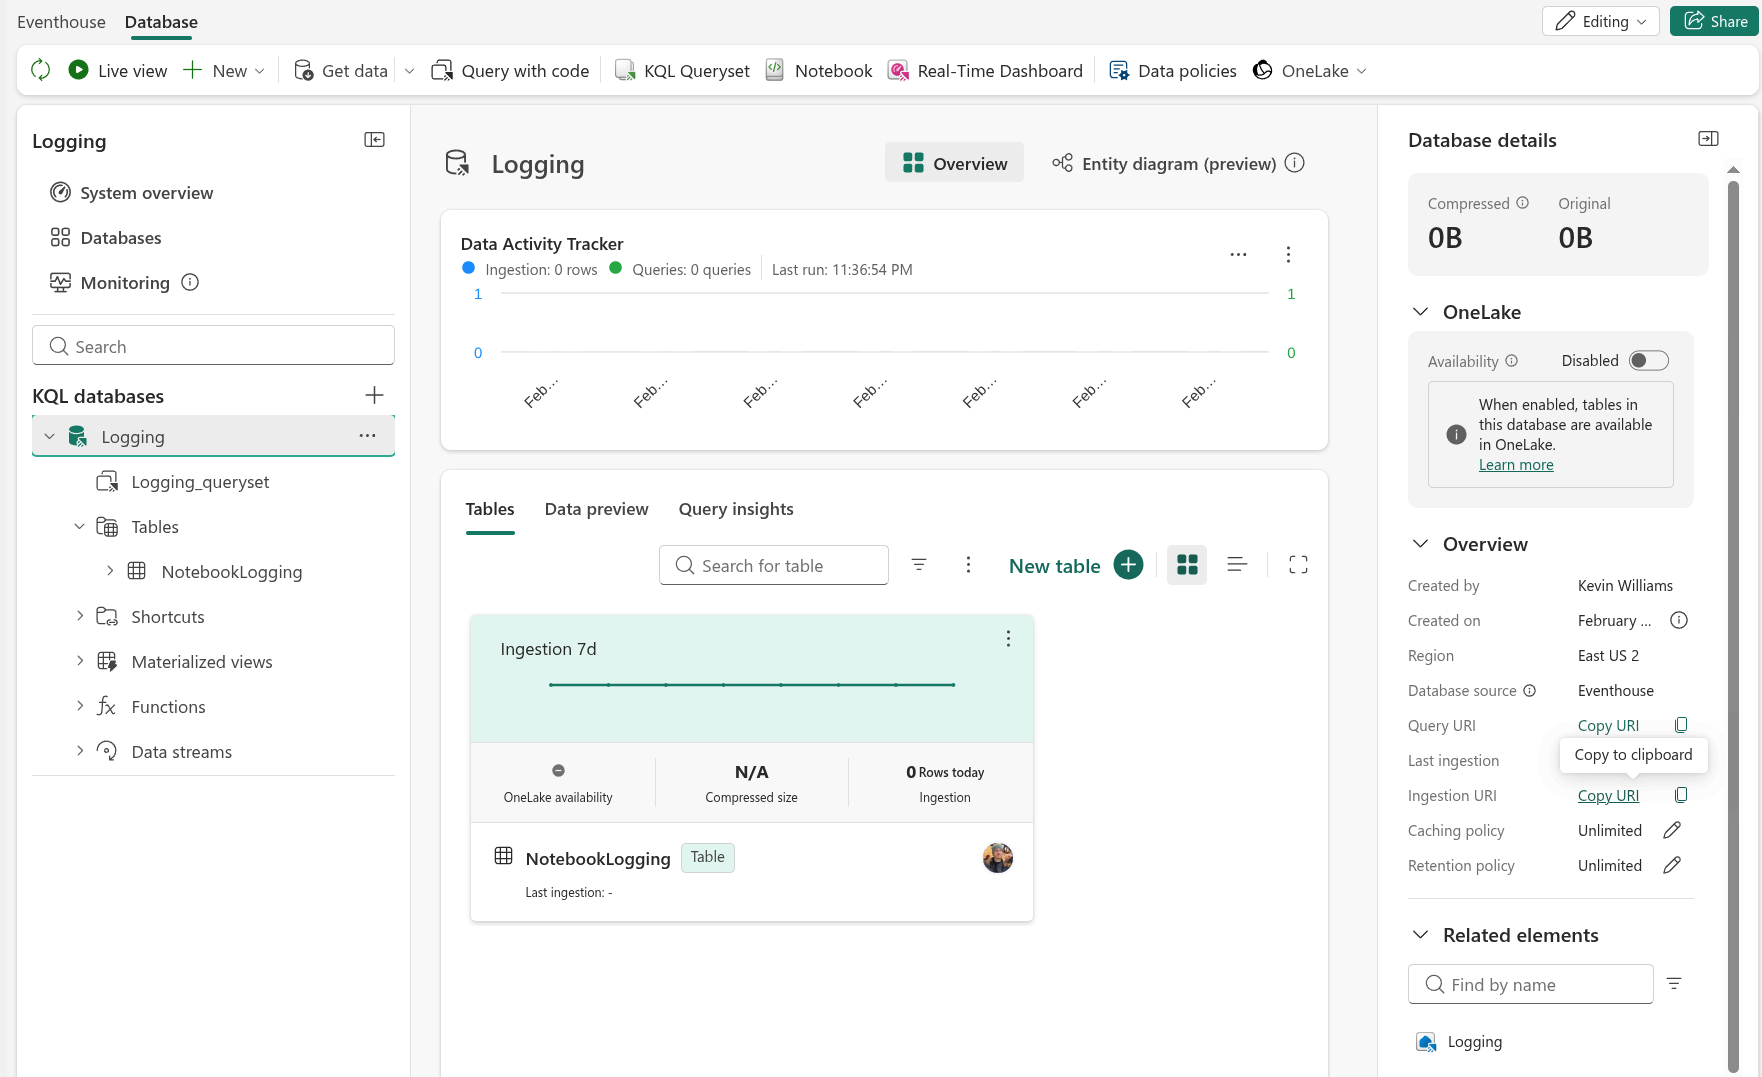
When the Eventhouse is finished being created, you will see there is a table with the same name as the Eventhouse. In this case it is called "Logging".
Click on the database.
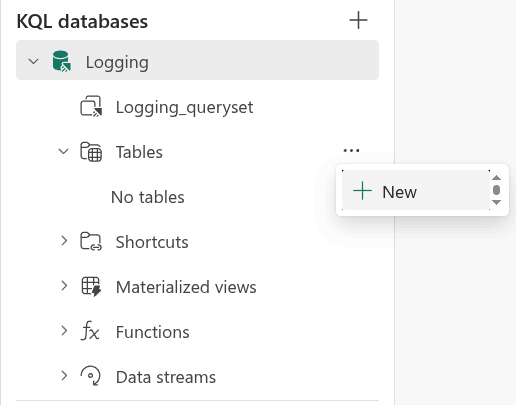
Now that you have clicked on the database, you can see a list item for tables. If you click on "Tables" it will show there is "No Tables". We will need to create one.
Click on the ellipsis next to the word Tables. Then click on "+ New"
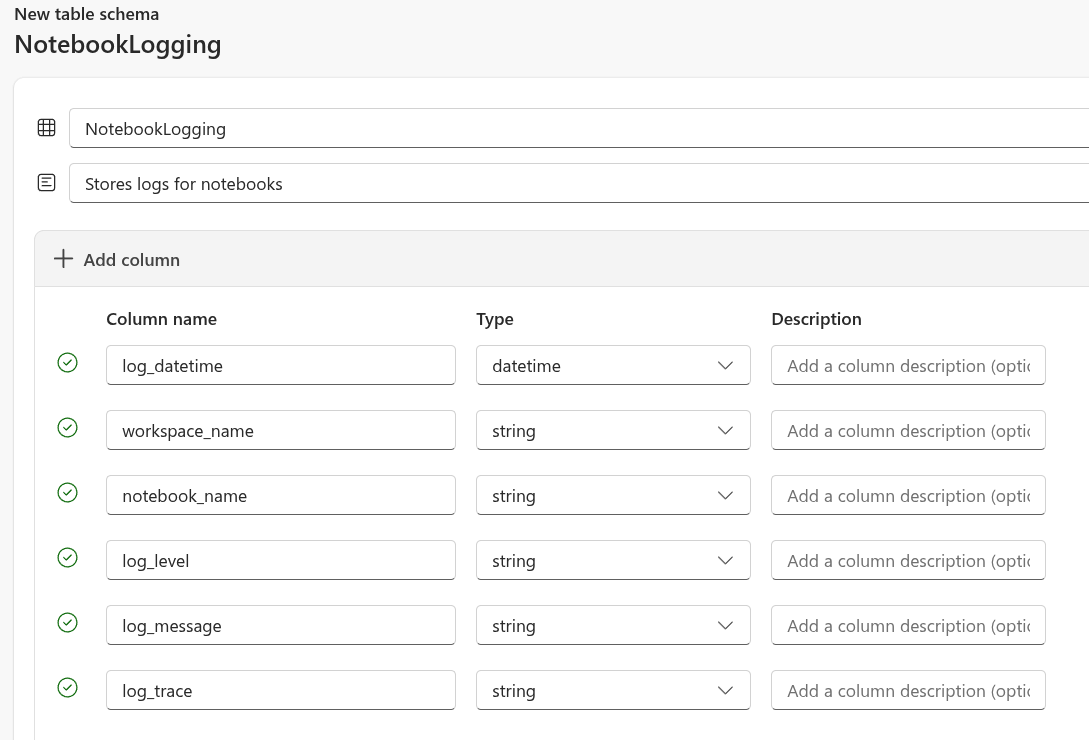
A new "Create table" dialogue will appear. On this screen we are going to enter the fields we want to use for our logging table. If you are going to use the code in this blog post, you will need to enter the fields to look like the image below.
You can give the table any name you want, but I called mine "NotebookLogging" to be specific about where the data in this table is coming from.
After you are finished, click the "Create" button on the bottom right side of the screen. When creation is completed, it should look like the image below.
Congratulations, You just created an Eventhouse!
Before we leave this screen, you will need to find the "Ingestion URI" and click on "Copy URI". Save this somewhere because you will need it for the next section.
Note: When you get the Ingestion URI, it might start with "https://ingest-trd-...". Remove the "ingest-" from the uri or you will get an error when running the code in the next section.
Create Fabric Notebook
Now that we created the Eventhouse we can create our Notebook to see how to implement our logging. If you want to just download an example, you can find it in my microsoft-fabric-notebooks github repo.
First, we will need to import the datetime library so we can use it for logging the accurate date and time our logs are created.
from datetime import datetime
from pyspark.sql.types import StructType, StructField, StringType, TimestampType
from pyspark.sql import SparkSession
Next, we will set up our variables.
- logs: This is going to store all the logs in our notebook that will be written to the Eventhouse.
- notebook_name: Using notebookutils.runtime.context we can get the name of the current notebook. This is helpful so that we don't have to update this variable in every new notesbook we copy this to.
- workspace_name: Using notebookutils.runtime.context we can get the name of the current workspace. This is helpful so that we don't have to update this variable in every new notesbook we copy this to.
logs = []
notebook_name = notebookutils.runtime.context.get("currentNotebookName")
workspace_name = notebookutils.runtime.context.get("currentWorkspaceName")
Now we will create some functions to make this a bit easier to read and use.
The log() function will be used to add logs to the log variable we set above. Notice that the log_trace parameter is optional.
The write_to_eventhouse() function is called at the end of the notebook to actually write the logs to the Eventhouse.
Make sure to populate all the variables with your specific values.
- database
- table
- eventhouse_uri
- columns_in_order
You can get the "eventhouse_uri" from the Ingest uri field in your KQL Database. Your uri will likely start with "https://ingest-trd-...". Remove "ingest-" from the string or you will get an error.
Notice the array "columns_in_order". This has to be set for when we call our spark.createDataFrame() we can set the order of the columns in the dataframe. If we do not do this the data will be sent to the Eventhouse in the wrong columns.
def log(log_level, log_message, log_trace=None):
    logs.append({
        "log_datetime": datetime.now(),
        "workspace_name": workspace_name,
        "notebook_name": notebook_name,
        "log_level": log_level,
        "log_message": log_message,
        "log_trace": log_trace
    })

def write_to_eventhouse(logs):
    database = "Logging"
    table = "NotebookLogging"
    eventhouse_uri = "https://<your-kusto-cluster>.kusto.fabric.microsoft.com"

    columns_in_order = [
        "log_datetime",
        "workspace_name",
        "notebook_name",
        "log_level",
        "log_message",
        "log_trace"
    ]

    schema = StructType([
        StructField("log_datetime", TimestampType(), nullable=False),
        StructField("workspace_name", StringType(), nullable=True),
        StructField("notebook_name", StringType(), nullable=True),
        StructField("log_level", StringType(), nullable=False),
        StructField("log_message", StringType(), nullable=False),
        StructField("log_trace", StringType(), nullable=True)
    ])

    try:
        df = spark.createDataFrame(logs, schema=schema).select(columns_in_order)

        df.write.format("com.microsoft.kusto.spark.synapse.datasource").\
        option("kustoCluster", eventhouse_uri).\
        option("kustoDatabase", database).\
        option("kustoTable", table).\
        option("accessToken", mssparkutils.credentials.getToken(eventhouse_uri)).\
        option("tableCreateOptions", "CreateIfNotExist").mode("Append").save()
    except Exception as e:
        print(e)
After we create our functions we can test creating logs.
# Test 1: No Trace
# In this example, we leave the "log_trace" parameter blank since there is nothing to trace.
log("Warning", "Test message 1")

# Test 2: With trace
# In this example, we trigger an error and capture it so we can see that a trace would look like in the logs.
import traceback

try:
    1 / 0  # This raises a ZeroDivisionError
except Exception as e:
    log("Warning", "Test message 2", traceback.format_exc())
Finally, we can test writing our logs to the Eventhouse.
write_to_eventhouse(logs)
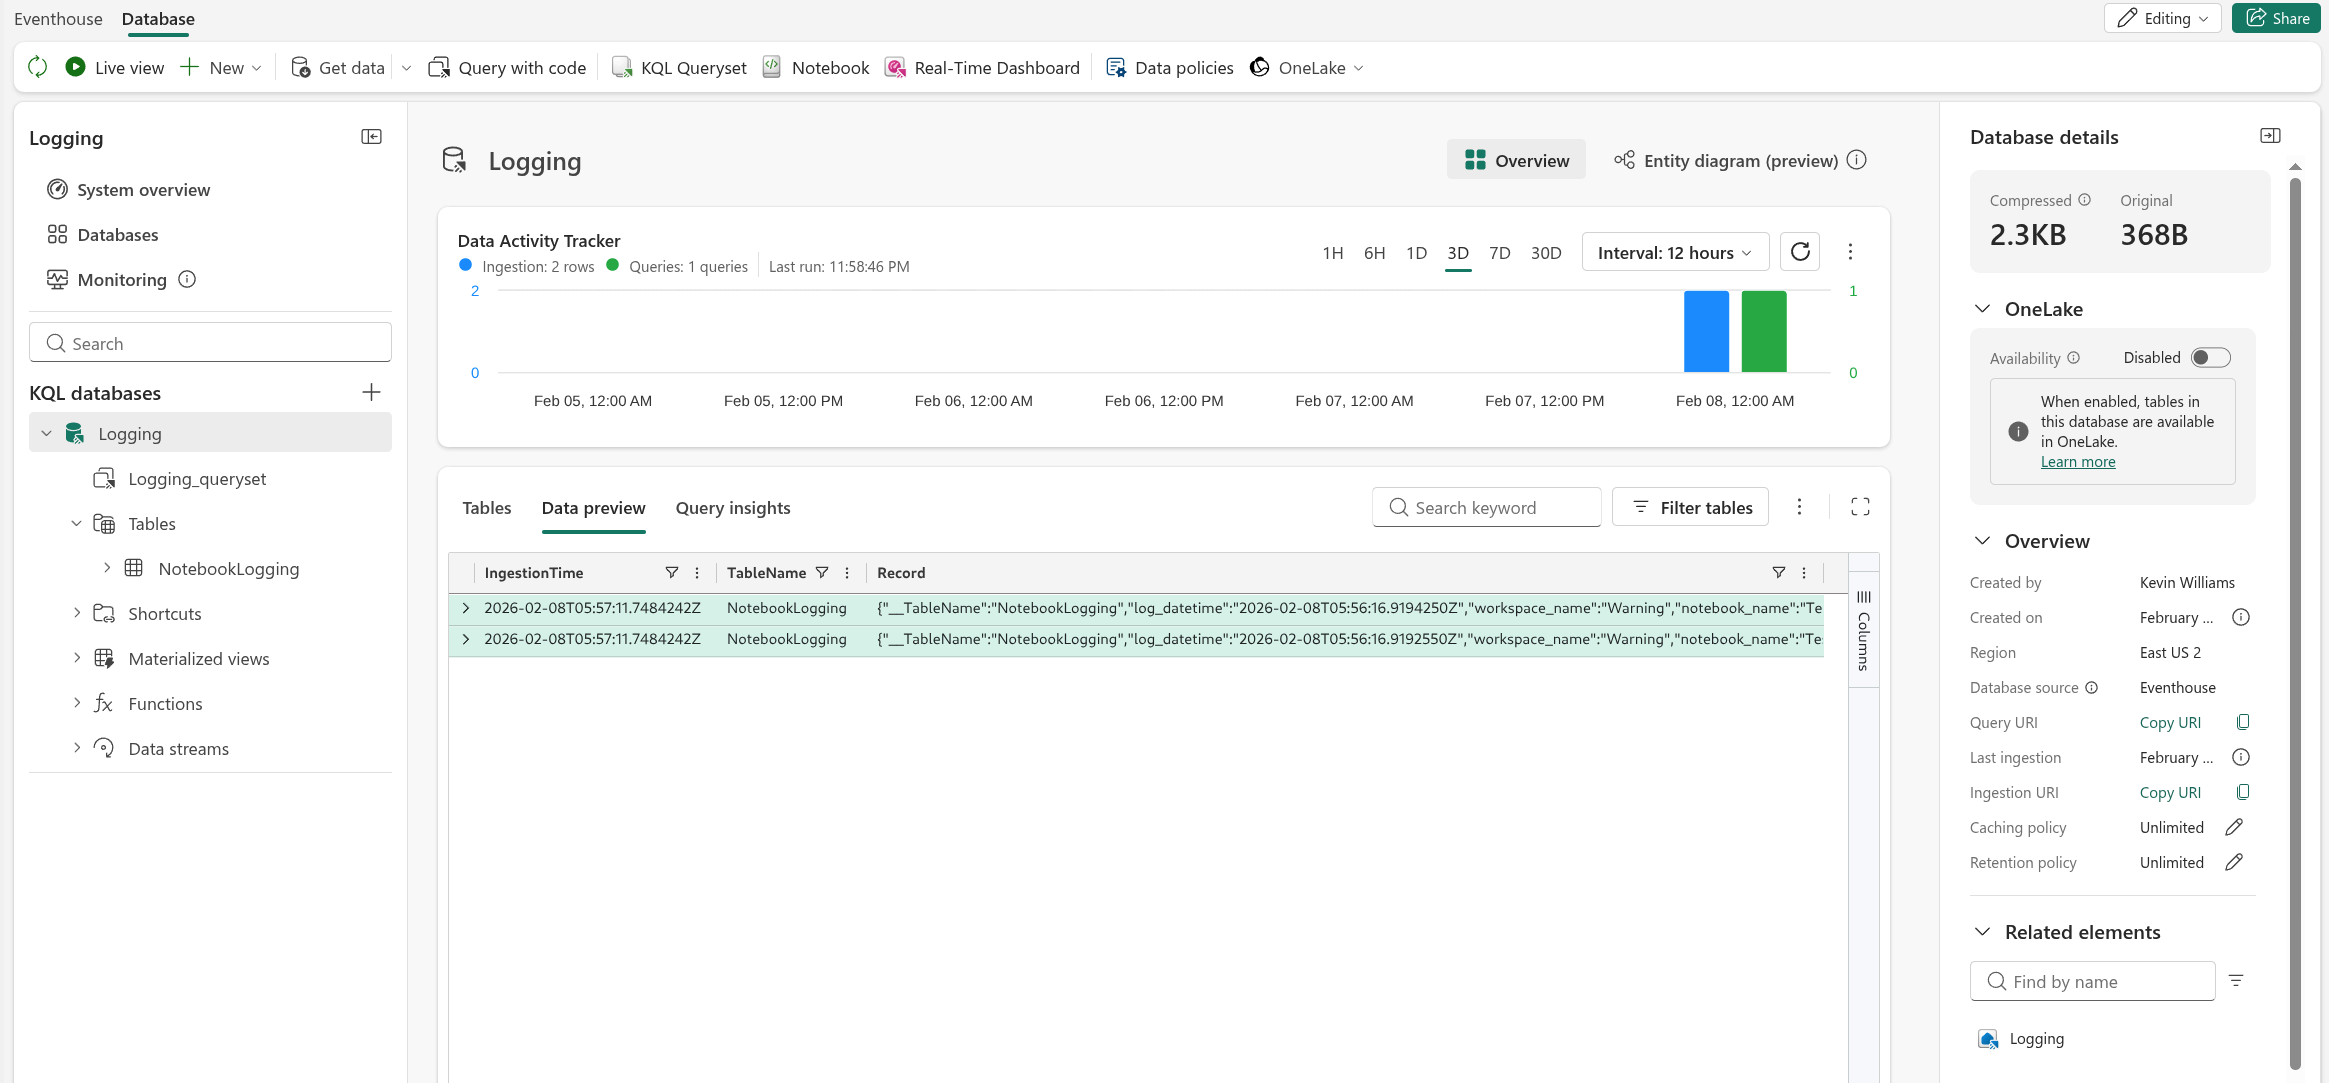
Testing Our Notebook
Run the notebook. If all is successful, you should be able to see the test records in your KQL database.
Conclusion
In this blog we took a look on how to use Python in a Notebook to send custom logging data to an Eventhouse in Microsoft Fabric.
From here you can create KQL queries to create real time dashboards on data being fed into the Eventhouse. I will cover how to do this in my next blog post.
I don't have a comments section yet, so feel free to send me feedback on this blog.

Kevin is a Senior Data Architect at a law firm specializing in Microsoft Fabric by day. Founder of Fact Foundry LLC and creator of data engineering tools in his spare time. He is a father, an occasional gamer, and lover of many different types of music.
The opinions expressed on this site are my own and may not represent my employer's view.

About this blog...
This blog post is a guide on how to setup custom logging to an Event house in Microsoft Fabric from a Notebook using Python.